The ultimate Game Center guide for dummies
- Beatka Wójciak
- Jun 9, 2023
- 7 min read

Updated: Jun 11, 2023
In every project’s life there comes a point when it’s time to stop tinkering and playing around with it, and start adding proper functionality. I reached that point when working on my game Squarelets when I wanted to add Game Center integration.

Game Center is a service provided by Apple that allows users to play with their friends online. It gives game developers an easy way to integrate social features such as leaderboards, challenges and multiplayer gaming.
You can integrate with Game Center by using GameKit and this is what this guide is about.
Set it up and buckle up
Apple’s products and services in general have an opinion of being good quality and easy to use. Unfortunately, Game Center is not one of them and I learned that the hard way.
The first thing to do is enabling Game Center in your app entry on App Store Connect:
Apps > Your game > Game CenterMake sure you also have it enabled in Xcode:
Workspace > Targets > Your game target > Signing & Capabilities > Add Game Center
This is where you hit the first roadblock: it can take up to a week for the capability to actually show up as available in your app. This means you won’t be able to authenticate a user and do any real testing of your integration until then.
Sometimes you can fix it by adding a leaderboard or an achievement, since this might trigger some update mechanism on the Apple side, but it didn’t work for me. This has been a known issue for many years, and there are no signs of it being fixed.
My advice here is to enable it well in advance before you plan to work on it, so that you don’t sit around pondering on the intricacies of syncing and caching algorithms.
Authenticating the user
This process is relatively straightforward. First step is making sure that the GameKit methods are available by adding
import GameKitto every file where you want to use it.
Most of the time you’ll want to authenticate local user, which you can achieve by setting the authenticateHandler like in the method below:
GKLocalPlayer.local.authenticateHandler = {
  viewController, error in
    if let viewController {
      // Present the view controller for authentication.
      present(viewController, animated: true)
      return
    }
    if let error {
      // Authentication failed - disable Game Center.
      return
    }
  }
}
Do this as soon as your app launches (in your application(_:willFinishLaunchingWithOptions:) in AppDelegate).
There are extra properties on GKLocalPlayer that you can use to change what options are available for your player. You can check for things such as players being underage, having multiplayer gaming or personalised communication restricted. The documentation has more details.
Creating leaderboards
In order to track players’ progress, you need to create a leaderboard that their scores will be saved to. The easiest way to do it is through App Store Connect under
Your game > Services > Game Center tab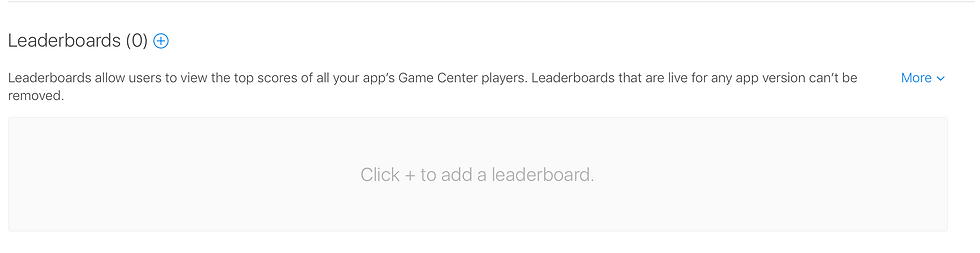
The website works for the most part, but can be a bit fidgety sometimes. If you are getting errors when adding or editing a leaderboard, try refreshing the page. I also got “Gateway error” a few times, which locked me out of App Store Connect entirely for about an hour.
Apart from that, the process is relatively straightforward. The good thing about leaderboards is that you probably won’t have to edit them very often, so any website issues you encounter will be relatively rare.
You can also skip the App Store Connect route altogether and upload leaderboard configuration using a tool called Transporter (or iTMSTransporter) - I’ll explain how to use it in the section about achievements.
Submitting scores
Once you have your player authenticated and your leaderboards all set up, it’s time to keep track of their scores!
The API for submitting scores has been updated to the new async/await style and is very straightforward to use:
try await GKLeaderboard.submitScore(
  playerScore,
  context: 0,
  player: GKLocalPlayer.local,
  leaderboardIDs: [leaderboardID])
This method allows you to submit scores to multiple leaderboards at once.
Adding achievements
Achievements are very similar to leaderboards: you register them in App Store Connect and then submit the user's progress on them. However, games typically have a lot of achievements which makes submitting them manually a very tedious process.
Luckily, this is where iTMSTransporter comes to the rescue! It’s a command line tool that allows you to upload all kinds of data about your app: all the Game Center metadata, in app purchases, your app screenshots, description etc.
For most metadata types you can skip using Transporter directly in favour of Fastlane (which uses Transporter under the hood making your life easier), but I didn’t find an extension that would work with achievements.
Install Transporter
Since Xcode 14, iTMSTransporter is no longer part of the IDE and needs to be downloaded separately from here.
To be able to use iTMSTransporter you’ll need to gather a few things:
Your username which is your Apple ID (the email address you use on your developer account)
Application specific password generated for your Apple ID on https://appleid.apple.com/account/manage

Your app ID which iTMSTransporter confusingly refers to as "Apple ID". You can find it in App Store Connect under
Your app > App Information > General information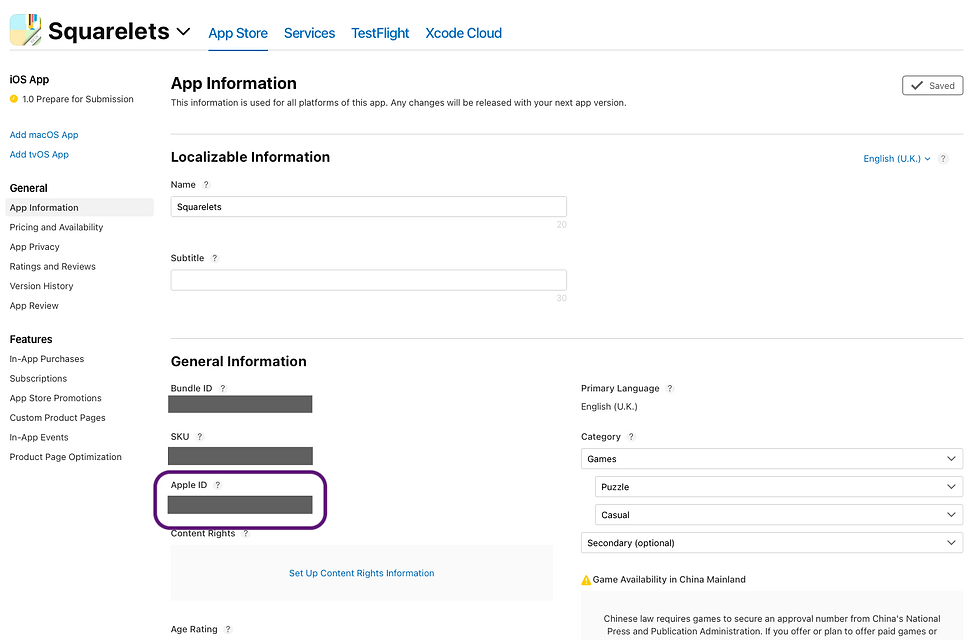
With these things sorted, it’s time to do some scripting!
First, find the Transporter location. Mine was installed in:
/usr/local/itms/binFor convenience, you can add its path to your .bash_profile or .zshrc to be able to call it from anywhere:
export PATH=$PATH:/usr/local/itms/binTo verify that the tool is set up correctly you can call
iTMSTransporter -versionGet your metadata
Once this is out of the way, we can move on to fetching actual data about your app. The main command you’ll need is lookupMetadata. It downloads the data you request into a package at a destination you specify.
You can request all data types available to you by calling it with an option all or use one of the types available to you. To see what data types are available call listReportTypes:
iTMSTransporter -m listReportTypes -u <Apple ID email> -p <app specific password>To request the list of achievements you already have in the app call:
iTMSTransporter -m lookupMetadata -u <Apple ID email> -p <app specific password> -destination <where to save the data> -subitemtype GameCenterAchievement -apple_id <Your app ID>
This will download a file called <Your app ID>.itmsp to the destination you specified. You can inspect the its contents by right clicking on it in Finder and selecting "Show package contents". There will be a metadata.xml file, which you’ll have to modify to add new achievements.
Important: if you added any achievements through the App Store Connect website, it’s best not to modify (and especially delete!) them in the metadata file. Some people mentioned this might break them.
I’d recommend managing your achievements in only one place for your own sanity, so you might want to delete them from App Store Connect and add them again with iTMSTransporter. You can also use it to delete the achievements you no longer need.
Update your metadata
Now it’s time to add new achievements. You’ll need to create an xml representation of the achievement data first. How you do it will depend on your project setup. For instance, I keep all my achievements in a master spreadsheet and I convert that data into an XML format with a little script I wrote.
I’m curious to hear how you manage your achievement information, let me know in the comments!
Regardless of which path you choose, your XML data will need to match the Apple spec, here’s a very basic example:
<game_center>
    <achievements>
        <achievement position="1">
            <achievement_id>29.2.achievement.1</achievement_id>
            <reference_name>Achievement One</reference_name>
            <points>10</points>
            <hidden>true</hidden>
            <reusable>true</reusable>
            <locales>
                <locale name="en-US">
                    <title>Achievement One</title>
                    <before_earned_description>Find 10 gold coins</before_earned_description>
                    <after_earned_description>Awesome! You found 10 gold coins</after_earned_description>
                    <achievement_after_earned_image>
                        <file_name>after_achievement_image.png</file_name>
                        <size>286243</size>
                        <checksum type="md5">c0f4c46dc16c4153cef37f6c868b7c5c</checksum>
                    </achievement_after_earned_image>
                </locale>
                <locale name="fr-FR" remove="true"/>
            </locales>
        </achievement>
    </achievements>
</game_center>
Add your newly generated data to <Your app ID>.itmsp/metadata.xml file. Pay attention especially to your achievement images. They have to be part of the <Your app ID>.itmsp package, and their md5 checksum needs to be up to date.
Upload it to the App Store
Before you upload the data, you can make sure that your file is correct. Call
iTMSTransporter -m verify -u <Apple ID email> -p <app specific password> -f <path to <Your app ID>.itmsp file>
If the verification is successful you can safely upload the data:
./iTMSTransporter -m upload -u <Apple ID email> -p <app specific password> -f <path to <Your app ID>.itmsp file>
At this point you should be able to see your newly added achievements in App Store Connect. It might take a few minutes for them to show up, have faith.
Submitting achievements in the game
Once your achievements are uploaded to the App Store, they can be updated during the game by using GKAchievement class. You can reference a specific achievement by providing it with an identifier matching the one you specified in your metadata:
let achievement = GKAchievement(identifier: achievementID)
At this point it's up to you how to treat your achievement. In general, there are two types of achievements:
binary: they're either achieved or not, for instance "Visit the Magic Cave"
progressive: their goal is to show user's progress as they get ahead in the game, for instance "Find 100 gems"
GameKit supports both of these types with the same API. Simply call
achievement.percentComplete = newProgressWhen you set percentComplete to 100, the achievement will be marked as complete.
When you update your achievement state, you'll need to submit it to Game Center which you can do using this API:
try await GKAchievement.report([achievement])You can report more than one achievement at once, and this doesn't have to be done immediately after updating the achievement - sometimes updates happen frequently (e.g. during battles) and it would add a lot of overhead to report the new state every time.
There’s a lot more that I could write about using Apple tooling and app development, for instance how to integrate iTMSTransporter with your CI/CD pipeline to save yourself some time and keep things in sync. Let me know what topics you’d like to know more about.
I will keep this guide updated as I learn more about various Game Center quirks. There are things such as challenges and multiplayer options that I’m planning to add to Squarelets so stay tuned!
Comments